Filed under How To Minecraft by Wordpuncher on August 14, 2013 at 11:27 am
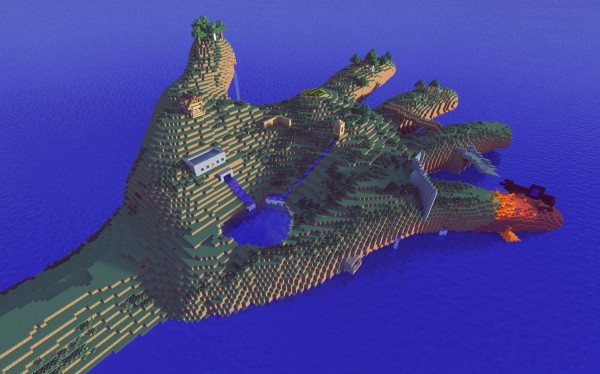
This stunning cross between a minecraft sculpture, render and island build was created by the undoubtedly talented minecrafter and redditor, Wheio. Here’s how he did it, in his own words:
- The raw terrain is created using WorldPainter. That isn’t grass; it’s two shades of stained, hardened clay.
- The large, customized trees are manually placed in using MCEdit. These trees are originally created byLetsLente and are available for download for use in your projects here.
- In ZBrush, a 3D model (the giant head) is sculpted or edited before being exported as an OBJ file.
- That OBJ is run through Binvox to convert it to a schematic file.
- The Schematic file is checked using ViewVox.
- The final Schematic file is imported and posed in the WorldPainter-made World using MCEdit. It is then changed from default stone into Quartz.
- For the first time, the world file is opened in vanilla Minecraft. Here the terrain is adjusted, with the small houses being built, the caves dug, and the waterfalls added. Smaller trees are bonemealed into existence along the ground, or hand built on the model. The model is also retrofitted to better fit it’s surroundings. In my case, I needed to almost completely destroy and rebuild the nose.
- The world is opened up using Chunky, excellent software built for rendering Minecraft worlds. The chunks that are visible from where the camera is are selected for rendering.
- In Chunky, the render is set up. Light-colored blocks (like Quartz and Sand) have trouble rendering in Chunky under the default setup, so the sun’s brightness, the photo gamma, and many other features are adjusted. The sun is also moved to where it best compliments the build. The sky is actually an image called a “Skymap” and there are many available online.
- The scene is rendered, a process which can be very time-consuming for the computer based on the complexity of the lighting. While the scene is being rendered, it might be a good idea to leave your computer and read a book. I suggest Ready Player One by Ernest Cline or The Fault in Our Stars by John Green. DFTBA!
- The image, now completely rendered, is imported into Photoshop. Here adjustments are made to the color of the photo. I find the David Nanchin actions to be helpful for this sort of thing, though I never run them full-strength. I also add in a water splash at the base of the water fall, and remove some pesky leaves that floated too far from their trees.
- The final image is exported from Photoshop and is ready to be seen by the lovely people of /r/Minecraft.
These step-by-step instructions as provided by the creator are incredibly useful for anyone who wants to learn how to sculpt minecraft creations, create custom terrain, make their own renders using Chunky and generally impress other people with minecraft pictures that say a million more words than a simple screenshot.
Filed under How To Minecraft, Minecraft Videos by Wordpuncher on July 31, 2013 at 1:10 am
These minecraft super tips comes from Okta’s ‘Five Things You May Not Know About Minecraft’ series, a great little YT series perfect for people who have been playing minecraft for a while and are interested in learning the tricks the pros use.
* Zombies will only burn in the sun if they are standing on a full block. Half blocks will keep zombies from burning.
* You can breed chickens with netherwort, pumpkin seeds, melon seeds and grass seeds.
* Leads can be unleashed by throwing snowballs at them, shooting them with an arrow, throwing an egg or tossing an ender pearl in their direction.
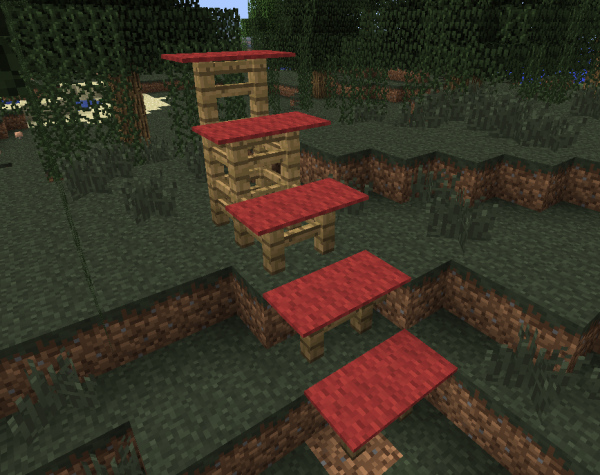
* Fences can be used as stairs if carpets are placed on top of them. This means you can build steep, tall staircases which are ascended super quickly.
*Using a nametag and calling a mob ‘Dinnerbone’ or ‘Grumm’ will make them turn upside down.
Check out Okta’s Five Things You May Not Know About Minecraft:
(more…)
Filed under How To Minecraft by Wordpuncher on June 26, 2013 at 8:49 am
Minecraft 1.6 requires the NEW minecraft launcher. It will not be available from your existing minecraft client. This means you need to go and download the new launcher, which is available directly from the official Mojang site or the Minecraft.net site.
Minecraft 1.6 Download Link 1
Minecraft 1.6 Download Link 2
How To Install Minecraft 1.6
Once you have downloaded the launcher, open it in the normal way. You will see this screen:
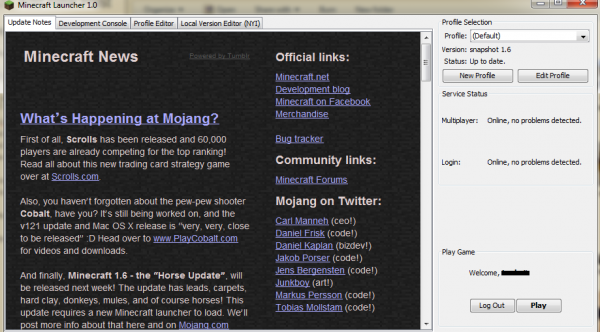
You can play minecraft as normal from this screen. You’ll also notice at the top right hand of the new launcher there is the ability to select which version of minecraft you would like to play. It is said that in the future, players will be able to easily switch between current and earlier minecraft releases, making it much easier to work with various multiplayer servers and modpacks which may or may not have updated to newer versions of minecraft.
Filed under How To Minecraft by Wordpuncher on June 26, 2013 at 8:31 am
 Minecraft 1.6 will be released on the 1st of July, so it is a good time to get familiar with some of the little changes being made to the game. Yes, there are horses. But horses won’t be the most pressing concern when spawning in a new survival world (especially as you’ll have to find a dungeon saddle before you can ride one anyway).
The new food and hunger system is of much more interest, I believe. In the past, players could take damage to their health, but heal easily if they had a full hunger bar. Well, all that is changing.
Healing now consumes food in minecraft.
If you take damage, your food bar will go down as you heal. This means that you will get hungrier a lot quicker, and it also means that you will heal more slowly because your food bar will drop as you heal. If you are taking ongoing damage, it is even possible that you could actually starve before your health bar goes.
What does this mean?
Food Tips For Minecraft 1.6
Carry plenty of quickly consumable, high calorie food when out. This change to the hunger mechanic and food bar means that you’ll need to eat fairly often. Some players will no doubt enjoy this, finding it to be more realistic.
You may also need to be much more careful about your use of the sprint button. Remember, sprinting depletes the food bar quite quickly, and once the food bar drops below the regeneration threshold, you won’t heal very well or at all if you take damage.
Filed under How To Minecraft by Wordpuncher on June 17, 2013 at 4:01 am
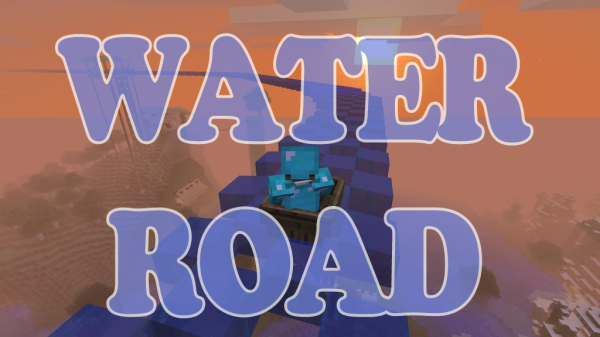
What is a road for boats? A canal! But we can’t call this a minecraft canal because it’s really not. No self-respecting canal would float in the sky and only contain water blocks every diagonal meter. And no self-respecting canal would consider the possibility of flinging those who travel along it into the stratosphere at a zillion miles per hour. Unlike minecarts, which can be difficult to control when you’re riding in one, using a boat to travel your water road means that you can fling yourself off the side of the road at any time. As long as you click out of the boat before it hits the ground you won’t even take fall damage. Now how you like those apples, huh?
This road can be placed along the ground or it can be elevated for a thrill a minute ride. This is not the safest way to travel in minecraft, not by a long shot, but it is probably one of the most fun ways to get around a map and all you need to build it are blocks of ice and dirt. So really dirt and a silk touch implement. Also: cheats.
This tutorial is made by reddit Minecrafter LonnieMac, to whom go the credit and the spoils.
Check out LonnieMac’s illustrated imgur water road tutorial!
Page 3 of 8«12345»...Last »


 Minecraft 1.6 will be released on the 1st of July, so it is a good time to get familiar with some of the little changes being made to the game. Yes, there are horses. But horses won’t be the most pressing concern when spawning in a new survival world (especially as you’ll have to find a dungeon saddle before you can ride one anyway).